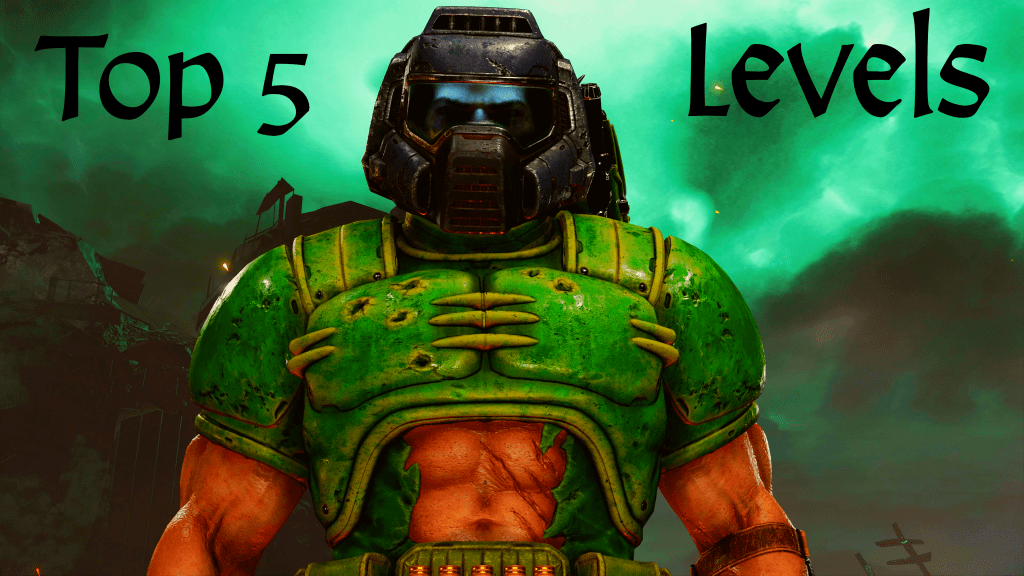
There I was, scrolling through my enormous backlog of games, analyzing the cover art and trying to imagine myself becoming immersed in each digital world. Am I in the mood for this? I ask myself. Maybe is the only unhelpful answer I can formulate. Then I get to a game that I’m always in the mood for. A game mingling with those numerous neglected titles in the same way a lion might mingle with sheep, nonchalantly roaming between them before finally deciding to pounce and rip one of their fuzzy little heads off. I can hear its growl. . . low and thunderous. I try to avert my eyes, to focus my attention on a game that I haven’t yet played after spending my hard-earned money to do so. . . but the growl persists. A bead of sweat drips down my forehead as the heat of hellfire itself permeates from that four-letter word. . . then the growl becomes a revving chainsaw. . . louder and louder until the only thing I can think of is demons being ripped and torn by steel teeth. I can’t fight it any longer. It’s time to play Doom Eternal once more.
But hey, I have a valid excuse this time, hence the list below. While each level of Doom Eternal’s base campaign provides enough gory glee to have player’s grinning like Doomguy’s classic status bar sprite from 1993, I’ve narrowed it down to the five levels most likely to melt faces by factoring in first impressions, environmental design and presentation, enemy arrangements, the structure of major battle zones, momentum, and a few more details that I’ll touch on in the appropriate entries. By the way, I’m saving The Ancient Gods DLCs for their own combined list, so don’t expect to see those here. Without further ado(om). . . welcome to my list of the top five Doom Eternal levels!
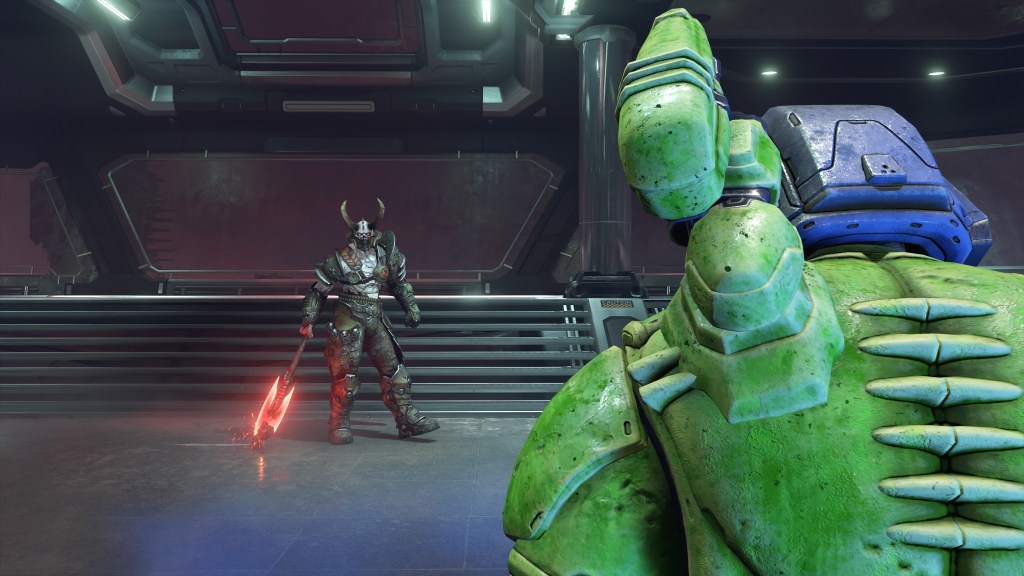
5. Cultist Base
It’s amazing how much of a difference can be made by going from hot to cold. In Cultist Base, the blazing inferno that typically represents demonic territory is replaced by a snowy region in the Artic tundra where the hell priest Deag Ranak resides, waiting to boastfully threaten the Slayer’s life as a yellow hologram, even though his physical form must be coated in a layer of pusillanimous perspiration as he hides for dear life and spurs on a legion of ultimately ineffective underworld lackeys to save him from the wrath of that really angry guy with his midriff showing (yes, I wear the classic armor 90% of the time. . . it’d be disrespectful not to).
The stark contrast between the red-hot hellish invasion of earth in the opening level to the frigid, desolate surroundings of Cultist Base builds on that same sense of freshness that Exultia’s grassy, grandiose setting brought to the table in the second level, allowing Doom Eternal to quickly prove itself as a matured sequel in all facets. I feel like I’m in the blood-spattered dress shoes of double-O Doomguy as I infiltrate the solitude of this cold steel base built on an icecap in the middle of nowhere. The perception that we’ve come to a unique place for a specific purpose is much stronger than it has been throughout other Doom games, striking a nice balance between simply killing all the demons to win and progressing through a carefully constructed campaign that continues to elevate in intensity and importance.
What serves as a stronger testament to the maturation of Doom Eternal than the new location Cultist Base provides are the entertaining environmental traps and tricks scattered throughout, both helping and hindering the Slayer in turn. Red mines can be detonated during the very first skirmish to annihilate fodder Zombies and stun Revenants. These reappear over the course of the mission, coming in especially handy when slithering Whiplashes are first introduced. Popping one of the easily visible mines will daze the Whiplashes long enough to lock onto their tails with a salvo of rockets, providing the base for a hearty snake stew.
A long hallway becomes a battleground on a couple of separate occasions, where enemies filter in from both sides. Dangling from the ceiling is a green switch that activates giant, swinging axes when shot, decimating anything in their way with one sharp, sweeping arc. This trap makes quite the desirable mess when multiple Mancubus appear, only to be wrangled within the epicenter of the splash zone like abdominous dominos before blowing apart from the force of medieval blades. I especially enjoy timing a Hell Knight’s leap with a shot of the switch, turning the headstrong beast into a cloud of red mist before he can land.
As for traps that the Slayer is subject to, a dastardly floor-dropping prank gets pulled about halfway through the level, restricting players to a claustrophobic space that quickly fills with enemies. Oh, and the walls and floor are engulfed by burning lasers that deal considerable damage with one wrong step or ill-planned dash. If you want to survive, it’s best to make use of Cueballs (variants of the Zombies with funny welding masks on and explosive canisters jammed into their bodies) which go flying forward when punched, detonating on impact. Although they appear sparingly throughout the rest of the campaign, Cultist Base provides some of the most appropriate instances to launch Cueballs around, and I always appreciate the way they sputter through the air before completely obliterating anything standing in their way.
Another memorable highlight that earns Cultist Base a spot on this list is the moment Vega chimes into the Slayer’s comms, saying, “Your Super Shotgun is nearby.” Although we’ve all cherished id Software’s legendary weapon for years and years, the promise of reuniting with those beautiful twin barrels is still as exciting as ever, even when I have it currently equipped on a completed game file! Vega’s cheeky reminder would be cool enough on its own, but acquiring the Super Shotgun requires mind-controlling a Revenant and blasting away its brethren in an arena inaccessible to the Slayer himself. It’s fun, comical, and a bit of a power-trip. Back in 2020, this was a hint at the upcoming Battlemode, which turned out to be good but not great. Still, the Revenant was my favorite demon to play when I grinded Battlemode for the platinum trophy (because I have a problem), so even though this sequence becomes more of an unnecessary aberration from the core gameplay loop on subsequent runs, I don’t mind being the puppet master to a little infighting. The best part of the entire segment comes when the Revenant is manipulated to return the weapon. It kneels and proffers the holy boomstick to the Slayer, who can then choose to spare the enslaved demon or take the Super Shotgun out for an immediate spin. Just remember: any decision other than point-blank evisceration would make the Slayer sick to his stomach. . .
4. Nekravol Part 2
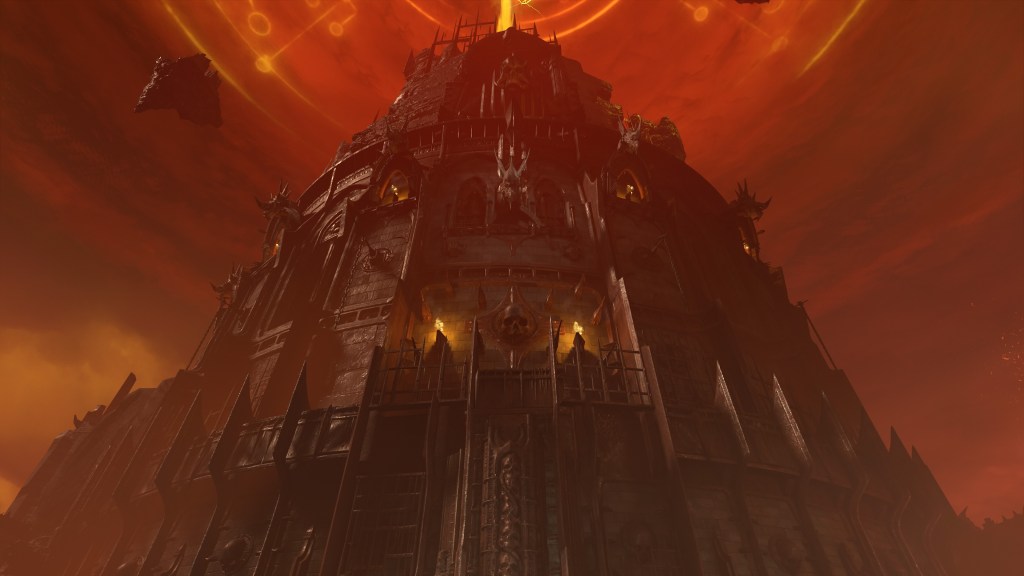
After blasting out of a BFG 10,000 without any repercussions in Mars Core, the Slayer isn’t finished riding waves of raw energy as shortcuts to his next destination. In Nekravol Part 2, he makes his way to the top of the Soul Spire, where a beam of Argent Energy is blasted into Urdak, realm of the Khan Makyr. Part 1 acts as the start of this journey, as Hayden narrates the process of soul extraction and repurposing while the Slayer makes his way further into the gruesome factory, even humorously climbing inside of a tiny little cage on a pulley at one point. Listening to the grainy rumble of Hayden’s voice as he details exactly how the horrible acquisition of suffering spirits is carried out by the rulers of Hell can be quite chilling, and the level serves up plenty of action, yet this action comes alongside an occasionally confusing map layout with roundabout platforming as well as a few uninspired confrontations. For example, one small battle that occurs features a Tyrant, Cyber-Mancubus, and an Arachnotron with an Onslaught power-up floating right in front of the Tyrant. Since this takes place in a small arena with a limited number of elite enemies, it’s a no-brainer to jump for the quad-damage and immediately eradicate the Tyrant and almost everything else. Sure, it’s fun to blast demons apart in a matter of seconds, but I feel a quad-damage should be saved for longer, multi-wave fights to test player temptation and prioritization.
There’s also a Marauder fight that takes place in a very small space, only serving to pressure players without allowing for the dynamic exploitation of their environment. I understand that’s the whole point, but I’d have rather gone up against multiple Marauders in one of the following rooms with switch-activated blocks of stone that thunder down into the ground and grind demons to a pulp on impact, because then the initial perception of three or four Marauders would feel excitingly terrifying and overwhelming, yet the chance to kill them in the blink of an eye would be available to those with a knack for good timing.
Finally, a dreaded segment involving hidden eyeballs, lava, sinking platforms, and Pain Elementals is one of my least favorite challenges in the game. Four glowing eyes are revealed and concealed on rotation until they are destroyed to lower an inconvenient shield in the way of the Slayer. However, every time I try to quickly pinpoint those god-forsaken pupils, I usually get killed by flames shooting out of vents in the floor and walls, lava bubbling up at my feet, and/or Pain Elementals chucking Lost Souls at my head while I desperately dash toward the next eyeball that has only become visible for a short period of time. Although the entire endeavor doesn’t take very long when it’s all said and done, I consider it a stick in the mud that hinders the level’s momentum.
Now that I’ve aired my few grievances with Nekravol Part 1, I can get on to how Part 2 rectifies them all. After some introductory dashing, climbing, and Cacodemon splattering, the action picks up and never ceases. Two significant battles occur back-to-back, including heavy hitters like an Archvile and Marauder (as expected by this point in the game). The first roomy arena glows blue with doomed souls flowing toward the Argent Energy beam at the top of the tower. There’s a Haste power-up available, which comes in handy when speedy Whiplashes show up alongside a Doom Hunter. Speaking of haste, the pace continues faster than a Pinky on rollerskates, causing Nekravol Part 2 to feel relatively shorter than its peers. Progress is only briefly stalled when more eyeballs need to be popped like blood balloons. Don’t worry, there are only two this time, and they don’t get intermittently covered up as you try shooting them. Easily avoided laser grids and a pesky Dread Knight that any avid Slayer-player can handily dispatch are all that distract from the task at hand.
The brief eyeball sequence precedes one of my favorite showdowns in the game, which takes place directly in front of the contained Argent Energy beam that must be exposed by breaking two massive, golden chains held taught by enormous demons in the distance. Before the chains can be broken, a host of evil entities including a Tyrant, Baron of Hell, and Doom Hunter must be stomped out. I love not only the look of this battleground, as its aesthetic is separate from the rest of the medieval tower and hints at Urdak’s ethereal composition, but also its naturally dramatic placement at the peak of the Soul Spire, as well as its flexible layout including jump pads in the corners and a monkey bar, ensuring many of the Slayer’s bullets will rain down from the sky like a proper lead shower. Overall, Nekravol Part 2 has an absorbing tempo, tons of bloodshed, cool-looking areas, and every type of demon you could want to kill. What more can you ask for?
3. Super Gore Nest
Please remain calm, you may notice a slight change in the environment.
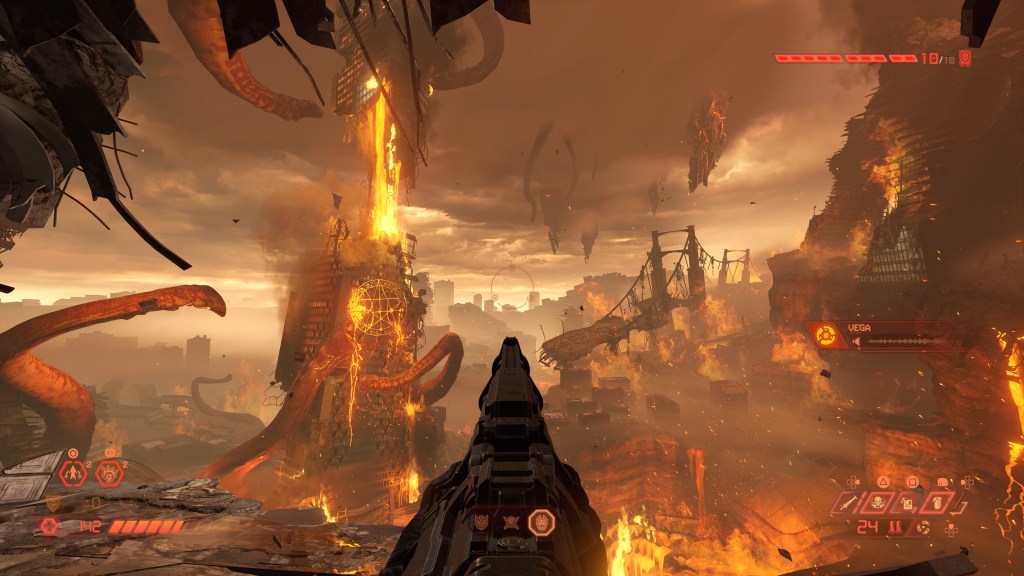
Super Gore Nest is exactly what it sounds like: a gigantic breeding ground for all the evil Hell can conjure. Looking out at the invaded wasteland at the outset of the level is remarkably beautiful for its scope and devastating detail. I can imagine the resident of a brownstone rental peering out at the same towering tentacles strangling the city itself, reading an email from his boss that says, “Yes, we are still coming in today.”
During Super Gore Nest, the Slayer is an exterminator. He tramples toward the source of the infestation where parasitic flesh coats the ground and grows from the walls, creating pulpy tunnels and caverns where there were none before. The opening battle hints at what’s to come in terms of incorporating verticality with wrap-around pathways that the Slayer can use to lure and/or escape pursuing demons. Shortly after a Pinky creates a way forward by charging through a set of doors, players will drop into a pocket of the nest that activates a Buff Totem, sending the few surrounding demons into a furious frenzy. I believe this is the only Buff Totem appearance that mandates direct confrontation before the totem can be found and destroyed. In other words, players must defeat a handful of enemies to reveal teleporters that warp the Slayer to different sections of the cave, eventually landing him right in front of the totem. What makes this ploy so fun is the panic induced by choosing the incorrect teleporter as buffed demons continue swarming within such a contained area. While you could go toe-to-toe against these enhanced abominations instead of hopping from teleporter to teleporter like Daisy (rest in peace), the promise of evening the odds is too tempting to turn down, at least on a first playthrough when the Slayer isn’t fully geared up, thus resulting in a tense hunt for the Buff Totem. It’s a shame that the rest of these aren’t hidden nearly as well, rendering them somewhat unnecessary as the game goes on.
The next major battle following the Buff Totem trap introduces one of the largest playgrounds for the Slayer to enjoy. It’s a wide-open area that encourages mid-air combat and traversal, with the inclusion of a small hollow accessible from multiple entry points that can be used to create some breathing room if overwhelmed, as well as to double back on eager demons and blow them away. The sense of freedom permitted by this expansive crater is unmatched by the levels that come before Super Gore Nest, securing this moment as a unique standout. id Software knew how cool it was, because you’ll fight in the same place again at the end of the level (albeit against far less enemies). Returning here after completing the game will probably have skilled players yearning for higher populations of fiends to frag, but hey, that’s what Master Levels are for.
Super Gore Nest also offers up some of the best platforming in the campaign. I’ve heard some complaints about Doom Eternal’s frequent inclusion of platforming by other reviewers, but I never agreed with the idea that there was too much platforming in the game, or that it was unresponsive. I’ve always been impressed by the seamless upgrade to the Slayer’s mobility from 2016 to 2020, and I enjoy leaping, dashing, and climbing my way through each interestingly constructed map. Super Gore Nest features plenty of neat little obstacle courses within the depths of the nest itself and outside of it. There are numerous money bars to swing from and gaps to dash across while avoiding toxic pools below and evading inflamed rotating chains on floating skull platforms, creating a satisfying sense of nimble proficiency that you don’t get in most FPS titles. Although Super Gore Nest doesn’t provide the same rush of flight as the booster-portals in Urdak, you can still get going quite fast at some points, further differentiating Doom Eternal from its direct predecessor as a much sleeker and speedier entry of the legendary franchise.
Luckily for humanity, the heart of the nest takes root at the power generator of a UAC facility, making the Slayer’s job simple: overload the generator with more power than it can handle, causing a massive explosion that will burst open the heart and put an end to the leeching proliferation of devilish breeding grounds. The completion of this task results in a final escape sequence during which players must race against the clock to navigate their way out of the nest before it implodes. It’s an exciting ending that barks worse than it bites, as demons appear on the fringes of the player’s path, but won’t outright block them from progressing, unless they come to a complete stop. Figuring out exactly where to go can be tricky on an initial run, but the fear of getting lost as time ticks down makes the whole thing seem more intense. Getting to watch the disgusting destruction of the Super Gore Nest from a cinematic vantage point at the end is the cherry on top of what goes down as the third best level in Doom Eternal.
2. Final Sin
The Doom Marine cannot save you. No one can save you.
Final Sin is basically Hell on Earth if the latter was imbued with the same Makyr power as the Slayer himself. The awesome ode to Doom 2 that Hell on Earth embodies at the very beginning of this ultra-violent voyage certainly left its mark on me. However, that level doesn’t make the list due to its tempered challenge and introductory nature. Fast forward to the very end of the game and it’s time to return to earth once more, though now the Slayer is fully equipped with all the weapons, upgrades, and ferocity he can muster for the ultimate purpose of tackling the hulking Icon of Sin once and for all. Before he can reach the resurrected goat-head terror, there will be lots and lots. . . and lots of resistance.
The beginning of the level takes place on a rooftop loaded with every infernal beast there is. There’s no such thing as taking a breath when the battle is complete, not with Hayden urging you forward as the Icon of Sin barrels its way through metropolitan structures that snap like toothpick sculptures against its gigantic, armored body. Taking huge leaps across yawning voids and landing inside of another wrecked skyscraper in pursuit of the lumbering titan is grippingly cinematic. There are constant dazzling apocalyptic views to enjoy between taking the next jump directly into another bloody, ballistic confrontation. I remember landing in an apartment building (or hotel) on my first playthrough, where a Tyrant was already waiting for me, amusing itself in the meantime by killing fodder. I felt a sense of pride when conquering another one of the Cyberdemon’s bastard stepchildren. A smile tugged at the corners of my mouth as the Slayer’s arm-blade sliced through the creature’s skull. Feeling satisfied with having crushed the leader of another patrol, it was time to clean up the rest. Then came two more Tyrants. Yes, I was savagely killed. Yes, I laughed in bemused shock at id Software’s old-school commitment to doubling down on the implications of the game’s last level. The memory of two Tyrants shuffling shoulder-to-shoulder down a short hallway to absolutely destroy me has stuck with me ever since 2020, and though I dealt with them much more smoothly when running the level a couple of times during the making of this list, the desperation of the demonic invasion is still palpable during Final Sin, as hordes of hell-spawn try their hardest to stop you.
The number two spot was a toss-up between Urdak and Final Sin, as each map contains more demons than you’ll think you can handle when you first see them all appear, non-demanding platforming that leads directly to more carnage, and an engaging buildup to a ferocious boss. It’s that last ingredient that tipped the scales in Final Sin’s favor, as I enjoy fighting against the Icon of Sin more than the Khan Makyr. While both fights are a bit lengthy and repetitive, the Icon of Sin showdown tasks players with doing what they’ve been doing all along: jumping around like crazy and killing demons for resources. The only caveat is that some of your firepower must be diverted toward the Icon of Sin itself, which is a hard target to miss. The Kahn Makyr fight, on the other hand, features no enemies other than Makyr drones, and not only demands that players whittle the Kahn Makyr’s multiple health bars down with projectiles, but also that they use a Blood Punch to shatter each one. If you mistime the punch or simply don’t have one loaded up when the Kahn Makyr is stunned, her health bar will recharge. Therefore, though I’d love for each boss to have its own mini level, like how Sentinel Prime showcases the Gladiator as to not overburden Mars Core, I find myself far more willing to earn repeat victories against the Icon of Sin than the Kahn Makyr, giving Final Sin the final push it needed to claim its penultimate placement.
1. ARC Complex
The ARC Complex is a masterpiece in Doom design. As soon as the level begins, it’s off to the races. The Slayer makes his way through dilapidated buildings that surround the office of Samuel Hayden, seeking Hayden’s cybernetic corpse for the purpose of reimbuing it with life. Demons blast through walls, break through glass, and barge through doors, sending rubble shooting out into ruined hallways and lobbies where the Slayer bounces around, creating unholy husks with his ruthless arsenal. Sometimes, the floor crumbles beneath the Slayer’s weight, delivering him to another impromptu warzone where Hell’s wickedness spawns in for a kill that never comes. It doesn’t hurt that Mick Gordon’s everlasting “The Only Thing They Fear is You” stars as the audial centerpiece of the level, which automatically takes the action up a few notches. The track surges with raw adrenaline and pairs extremely well with the mayhem unfolding onscreen.
The mixture of locations on this map is incredible, as the Slayer goes from the upper floors of corporate skyscrapers ravaged by flame and destruction, to an outdoor battleground rife with purple goo (including a jump pad and plenty of raised ledges to mitigate the annoying standstill feeling purple goo causes in previous levels without the same available recourse, turning it into a more optional obstacle that punishes players who aren’t careful), to the interior of a crashed airplane hanging halfway out of a building, to Mario’s a la Carte restaurant that provides the stage for an intensely crowded battle, then into the bowels of the ARC facility itself, through a partially collapsed parking garage, and back into the facility for a climactic duel against the first Marauder in the game. It’s always clear where you’ve got to go next, so the flow of pure chaos is never restricted. Because of such variety, I often feel as though I’m playing a mash-up of levels like Hell on Earth, Super Gore Nest, and Final Sin, which, especially considering the latter two’s placements on this list, is a very good perception for ARC Complex to evoke.
I commend the usage of demons in this level. There is an abundance of Mancubus that clog up escape routes. They fill up the restaurant where rapidly getting rid of such roadblocks is essential to survival. I admittedly die in that place at least once per playthrough, as Whiplashes and Nightmare Imps do their jobs all too well of distracting from the lethal toxins spewed out from a Cyber-Mancubus’ arm-cannons, though there is a rare Berserk power-up just begging to be collected that I often overlook until it’s too late. id Software also tosses in lots of Revenants and Hell Knights, putting in-your-face and faraway pressure on the Slayer at once. Even without the full lineup of demons having become active this far into the campaign, I’m never longing to go up against Baron’s of Hell or Tyrants like I am on earlier maps during repeat playthroughs.
Finally, the determination of the Slayer is possibly at its most contagious during ARC Complex, as downtime is almost nonexistent during the entirety of the level, and the sanguine salvation delivered to unwilling demonic forces is bottomless. As “The Only Thing They Fear is You” rattles your headphones, you’ll feel appropriately fearless, trudging forward until it’s time to begin the Marauder duel that was excitingly teased and hyped up by Hugo Martin, a duel that was initially intimidating and somewhat perplexing as the Marauder deploys his shield against most gunfire and summons his spirit dog as a consequence for unsuccessfully shooting at him, yet becomes more and more comical the better you get at the game. After conquering The Ancient Gods Part 1 and 2, in addition to each Master Level on Nightmare difficulty, this lone Marauder now folds before the Slayer like paper plates at a grad party. It’s the accusatory screed the Marauder insists on delivering that makes his swift death so entertaining. He’s not as tough as he thinks, but then again, who can defeat the Slayer? I guess you’ve got to admire the confidence. . .
Doom Eternal is one of those games I’ll always make time for, despite owning a lot of other untouched titles crying out for my attention. While I’d happily replay the entire game in full (and often do), the levels I’ve discussed here allow for id Software’s masterpiece to fire on all cylinders, pumping endorphins into my brain like an Arachnotron being microwave-beamed with a plasma rifle. It’s kind of crazy how The Ancient Gods DLC and Master Levels manage to amp things up to 11, for better or (occasionally) worse, but I’ll be covering those soon, so stay tuned!

Leave a comment