PART ONE
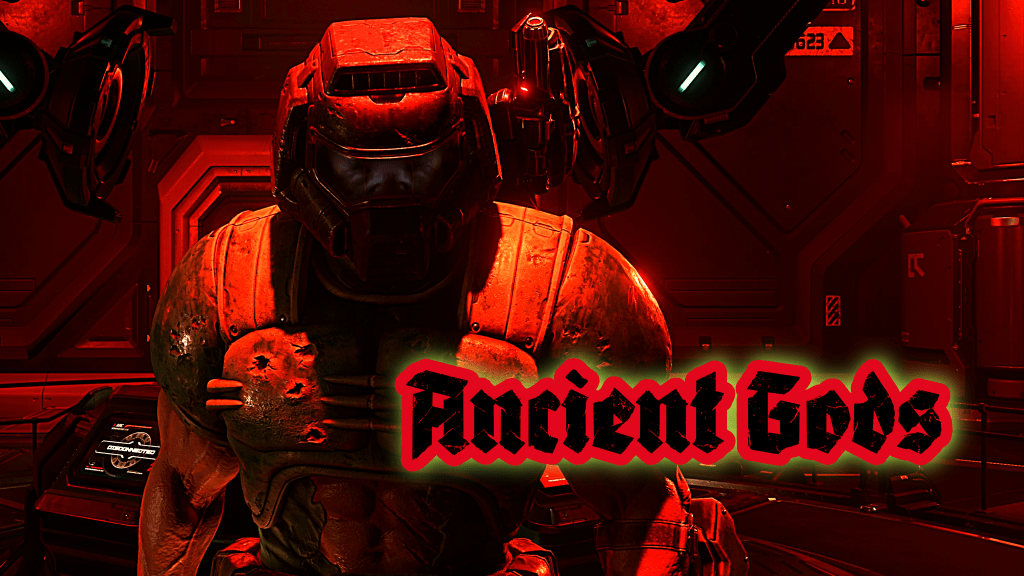
The dark ages are almost upon us. No, I don’t mean Hollow Knight: Silksong is being entirely cancelled, or that a remake of Resident Evil: Code Veronica is coming out with Steve as the main character, voiced exactly as he was in 2000. Not the bad dark ages. The good dark ages. Doom: The Dark Ages looms in the very near future (May 15th, to be exact). After watching the gameplay trailer and learning that id Software is taking some of the freneticism out of their combat blueprint, choosing to replace it with a grittier, gnash your teeth and shoot skulls out of a giant death contraption approach, I find it only proper to say a respectful farewell to Doom Eternal and all its hectic bloodletting by revisiting the game at its most hectic. In The Ancient Gods parts 1 & 2 (hereby referred to as TAG 1 & 2), the Doom Slayer is pushed to his absolute limits in his quest to defeat the flagrantly monikered Dark Lord. As the Doom Slayer is canonically OP, and the base game already seemed fit to burst with varied demons, weapons, mods, gadgets, and special tools like the Crucible Blade, id Software had a tough task ahead of them when cooking up what was supposed to be an even more head-spinning power trip than before. TAG 1 & 2 are certainly very challenging, each loaded with new combat obstacles (for better or worse) that test players in somewhat new ways than they’re used to. As I already ranked my top five levels from the campaign back in August, I’ll be breaking down the DLC this time around. Then, I can set Doom Eternal down inside its sarcophagus and tentatively seal the lid as I await the arrival of the Doom Slayer’s medieval murder spree in May. Hell yes.
Returning to TAG 1 was like stepping out for a run after a multi-week hiatus. A few minutes in and I feel great, a smile on my face as I get going. As the run progresses, I realize I’m a bit rusty. I begin to pant, sweat forming on my brow. My chest burns and I’m still under one mile in. There’s a hill in the distance. I ask myself if it’s even worth tackling, or if I should just warm myself up with a walk instead. But then I hit the one-mile landmark and feel a familiar sense of satisfaction that never fails to push me forward. By the end, I’m happy I went for the run, despite already feeling sore and slightly disappointed with my overall performance. TAG 1 is daunting. Sometimes, it’s awesomely daunting, just like Doom Eternal’s campaign. Watching two Barons of Hell spawn into a tiny arena that already has two Tyrants squeezed into it, ceaselessly shooting deadly lasers, provides a rush of panic and an eagerness to destroy, thus creating an addicting concoction of fear and anticipation. Other times, TAG 1 is eye-rolling, as players must survive in the face of a test that feels more artificial than anything seen in the base game or Master Levels.
The additions that TAG 1 makes to the core gameplay are a mixture of careful ambition and desperate evolution. I’m not accusing the folks at id Software of shooting random mechanics out of their game design guns, but it can occasionally feel like building on something as complex and crazy as Doom Eternal, while maintaining the same level of captivation, was simply too unrealistic to pull off without a hitch. The first change you’ll notice is purple eyeball turrets placed sporadically throughout each lengthy mission. During the Doom Slayer’s infiltration and later evacuation from the storm-lashed UAC Atlantica Facility, these peek-a-boo turrets arrive to demand rapid precision from players, as the eyeballs appear for only a short enough time to fire a barrage of plasma, then hide within their columnal nest to recharge. When other enemies are hunting you down, it can be difficult to pinpoint the eyeball with a couple of well-placed Ballista rounds, rockets, sticky bombs from the Combat Shotgun, ect. Therefore, the eyeballs serve as distractions that need not be immediately eliminated but should be targeted rather quickly to avoid annoyance. The difference they make to battles is minimal, and because they’re a static enemy that don’t threaten the Doom Slayer with comparable speed or agility, it’s easy to shrug them off as an environmental hazard. As eyeball turrets are the first and only new enemy that appears in the opening mission, the UAC Atlantica Facility feels almost like a Master Level extension of ARC Complex, with a similar setting and packs of well-known elite enemies warping into compact combat arenas. For this reason, the DLC doesn’t feel very fresh or new until Blood Swamps, the second mission and obvious highlight of TAG 1, at least in my opinion.
There are several reasons why Blood Swamps reigns supreme. First and foremost, it presents players with a brand-new biome that doesn’t resemble anything we’ve seen in the base game. A shield-shaped relic that functions as a key has been broken into two pieces, each placed on opposite sides of the map. To retrieve the key, the Doom Slayer must travel to the sites of two separate combat trials, killing everything (surprise, surprise) to move on. Navigating a toxic swamp that’s loaded with exploding bubbles of burning acid can leave the Doom Slayer battered before ever being blasted with a demon projectile. It’s clear that id Software wanted players to be more careful about their dashing and jumping when trying to escape certain death.
There are also several cheeky standout moments that occur, like when a Doom Hunter spawns into the map, just after an enormous, flailing tentacle, one hundred times bigger than what players are already used to. It slaps at the player as the Doom Hunter’s sled spits rockets, poison pods explode in every corner, and other demons cause their usual ruckus. Later, players must cross a marsh so foggy that a group of already hard to see specters are all but invisible, and a Spirit-possessed Arachnotron (more on Spirits soon) becomes an extremely dangerous hide and seeker to tango with. Finally, the green, howling ghost dog that first appeared in Exultia returns as your escort, this time projecting a radial forefield that players must remain within as they follow their guide, lest they be slowly dissolved by the volatile air in a particularly noxious part of the swamps. The dog will come to multiple stops, during which its forcefield becomes temporarily fixed. From the fog-shrouded surroundings outside of the forcefield emerge several enemies, which players must defeat within the tiny circular safe-space they are allotted. I really enjoyed the way this segment increased the difficulty by gradually upping the ante. Fighting Dread Knights, several spammy Riot Soldiers, and eventually a Marauder in such close quarters is good example of id Software’s creative torment. It is during these moments that TAG 1 feels at its most unique, rather than an overstuffed version of the same game.
Another major ingredient in TAG 1 is Spirits. These blue phantoms overtake the bodies of nearby demons, imbuing their weak points with invincibility while buffing their strength and speed, as well as upping their durability. Demons will spawn already possessed, first witnessed in Blood Swamps. When defeated, their corpse will crumble into a bloody heap, leaving behind a floating Spirit. The Spirit then emits a wispy tendril of hellish magic that attaches itself to another demon in the vicinity. If left to its own devices, the Spirit will repeatedly carry out the possession process. If, however, players use the microwave beam on the Plasma Rifle to slowly but surely zap it from existence, then they will avoid being harassed by yet another buffed legionnaire of the Dark Lord’s army. Spirits are generally counteractive to the rhythm that Doom Eternal already so expertly established. Forks in the road are a staple of the game. Do I shoot the Arachnotron’s plasma cannon with a precision shot from the Assault Rifle, or do I not trust my aim enough amid so much chaos, and should instead elect to use the more forgiving sticky bombs? What if I’m out of ammunition in my Combat Shotgun? Do I have the chance to rip and tear a fodder demon with the chainsaw, or should I quickly switch to the Ballista, landing one shot that requires slightly less accuracy than the precision shot? Of course, I could always yank the quad-barrel Chaingun out of its mystery holster and hunker down, firing a stream of rounds into the creature’s brain matter while indifferently disregarding its most dangerous feature. As you can tell (and probably already know by now if you’re reading this), it’s not just one fork in the road that presents itself during these snap-decision moments, but plenty of them. There are often a handful of ways to get the job done, though only one or two of those options are usually viable in certain contexts, thus establishing a blissful balance of particular exploitation and seamless fluidity. Spirits, however, set up barricades in the way of any alternate path, preventing players from capitalizing on weak-points and forcing them to use the microwave eam, a modification I barely touched in the base game. Maybe id Software’s statistics revealed similar neglect from the majority of players, because they shoehorn the microwave beam into the game like they felt bad for the last kid to get picked in dodgeball.
Sure, it can be somewhat fun to bunny-hop in circles, trying to keep the beam aimed at its target while avoiding projectiles you can’t even see, but once you do it a few times, the novelty of the Doom Slayer turning into Mr. Twinkle-Toes wears off, and you’re left somewhat underwhelmed with id Software’s attempt at innovation for the first time since Doom released in 2016. If the Spirits’ functionality was a little more interesting, maybe I could excuse a lack of flexible solutions to the problem they pose, but all it does is buff demons to the point of imperviousness when up against the Doom Slayer’s most useful tools. Yes, that’s the idea . . . but why? Who was clamoring for the same demons we’ve already seen to eat triple the number of bullets than before, while ignoring frag and ice grenades, weak point targeting, and any other staggering impact? A Baron of Hell careening toward you, its eyes glowing blue, instills disappointment at the realization that half of the Doom Slayer’s arsenal has just become obsolete. Well, maybe not entirely obsolete, as it’ll all cause damage, but the distinctively impressive flow of Doom Eternal becomes subject to another lull, as cycling through your available options suddenly becomes far less tactical than usual. By now I’m used to it and Spirits aren’t so bad, but I do wish their arrival had been more cleverly woven in. Maybe they should bounce from demon to demon during a fight, so you can either try to get rid of it immediately or wait for it to exit the body of a deadlier demon, kill the weaker one and its Spirit, then focus on everything else.
Maybe this makes me a hypocrite, but I do enjoy the increased presence of Buff Totems during TAG 1. An underutilized asset in the base game, Buff Totems pop up a lot more here, sometimes with a fun catch connected to them. There’s a moment when, after shattering one totem, another is unexpectedly summoned later in the same fight, which caught me pleasantly off guard the first time. When searching for Buff Totems, buffed demons can be ignored unless directly blocking your path, in which case it may be worth engaging with them. Finding the totem then produces a wave a relief and it’s right back into the action. Because the buffs are reversible, panic at being chased by faster, stronger Cacodemons and Dread Knights is actually entertaining. The knowledge that assistance is somewhere close by keeps hopes of survival strong. During another segment in Blood Swamps, a Buff Totem is placed in the middle of a small chamber, locked behind a cage. A Marauder steps out from his black and red portal, a crimson aura coming off him like smoke. You realize there is no choice but to face him, mano a mano. The difference between this Marauder duel and Spirit demons is the fact that the Marauder is alone. Buffed, but alone, and still subject to stuns when he flashes green. It’s another scenario-based addition to the Doom Eternal formula that I can appreciate. Sometimes, it’s not about adding more ingredients, it’s what you do with them. After witnessing so many adept players tear up the base campaign, id Software took plenty of opportunities in TAG 1 to put those same confident players through often humorously intense ordeals, made to feel fresh by how much differently the pieces have been put together. I consider the aforementioned Arachnotron encounter in the foggy marsh as belonging to this same category, since that Spirit demon is incorporated more thoughtfully than others. It’s also accompanied by less supplementary enemies and a purposefully disorienting mistiness.
So, do I like TAG 1 or don’t I? Well, that’s a loaded question. I like parts of TAG 1, while other parts can feel like cut content from past levels. UAC Atlantica Facility and The Holt are sometimes a little too reminiscent of campaign levels, though the former is especially visually impressive with plenty of hardcore action to boot. I really enjoy jumping around the outer edges of the facility as lightning scars the sky in the distance and rain torrentially pours. The sea below heaves in foamy waves, enraged by the clashing winds and heavy energy of the storm above. Many battles take place in cramped arenas, testing the Doom Slayer’s resourceful maneuverability. Moving on to the Blood Swamps shakes things up a bit more, building on the intensity and introducing a few fun conundrums. At the end of Blood Swamps appears the first “boss,” written between quotations for the fact that it’s a floating box with an eyeball in the middle of it. Much like with the turrets, the eyeball only appears for a short enough time to land a few shots. Since the box is always in the air, it’s harder to keep track of the Hell Knights and Pinky demons that spawn into the fight at ground level, making this boss battle ultimately unsatisfying. Wait and shoot. . . wait and shoot.
Next comes The Holt, taking place in the ethereal Urdak. This level is probably the weakest of the trio, hindered by the arrival of Blood Makyrs, advanced versions of Makyr Drones that shoot hot lightning from a staff. They’re unable to receive damage, except when preparing for a powerful attack, during which time their shield is briefly inactive. In the meantime, they’ll shower the Doom Slayer with area-of-effect attacks that slow him down and are often hard to register until it’s already too late. These guys are just no fun to fight. To kill them, a headshot must be landed with the precision of a qualified keyboard and mouse user. Unlike against the Spirits, you can use multiple weapons to take them out, yet similarly to the eyeball turrets, you only have a couple of seconds to do so before they become immune to damage once more. Combine that with their annoying offensive capabilities and you have another bummer of a new enemy.
Blood Makyrs also pop up in the final boss fight against Samur, because of course they do. Samur himself doesn’t pose much of a threat, but the arena around him, as well as his gimmick of summoning demons possessed by Spirits which must both be killed before Samur’s forcefield disappears, is what makes this fight feel like the rotted, worm-infested cherry on top of TAG 1. A laser grid will appear in a room housing several platforms. Falling from one of these platforms will send you down to the floor where eyeballs surrounded by radial electricity will punish your inadequate agility. In other words, it’s a fight where the central enemy is the least of your worries, resulting in a tedious struggle against spastic Spirit demons in a rather uninteresting arena that’s been arbitrarily accented by traps. Though Icon of Sin was also more of a background boss at the end of the base game, it still functioned like a fun enough extension of the same enjoyable rapid action that players know and love, whereas Samur’s additional enemies are few and frustrating, set free to chase the Doom Slayer in a relatively small space.
Overall, TAG 1 does scratch the itch for more Doom Eternal, at the cost of occasionally faltering its attempts to simultaneously surprise and please seasoned players. When it does succeed in presenting tense scenarios to wrangle with, TAG 1 can be an exhilarating spectacle, despite retaining many visuals we’ve already seen. With that being said, let’s move on to TAG 2
PART TWO
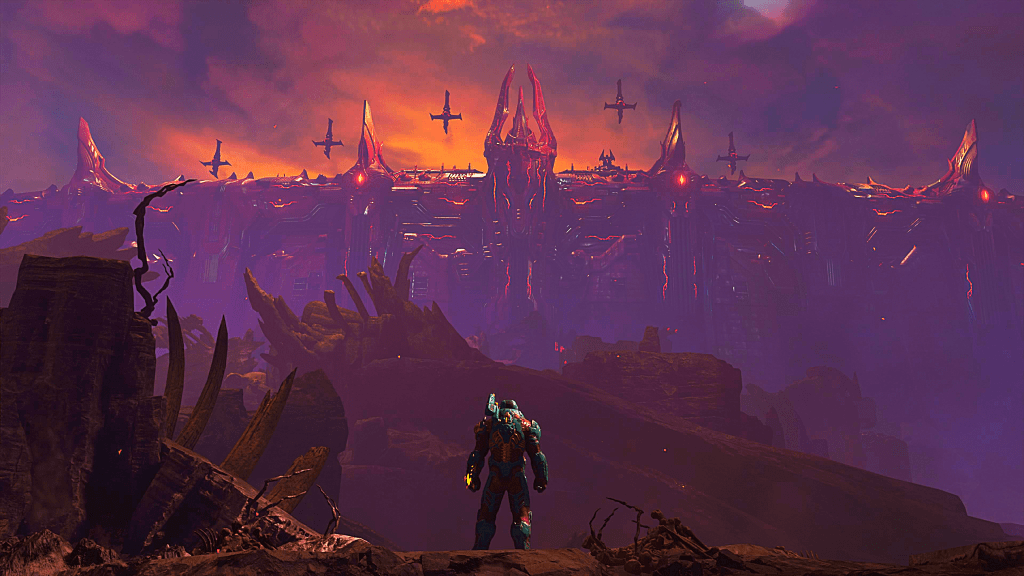
The opening to TAG 2 features the soothing synthesized growl of Mick Gordon-esque chords as white text covers the screen like it’s the beginning of Terminator, reminding us of the events leading up to the fake-out confrontation between the Doom Slayer and the Dark Lord. Then, after enjoying a metal musical cue to officially kick things off, it’s time to reach The World Spear. The exact purpose of the Doom Slayer’s faraway trip is . . . um, well, it’s because . . . hmmmmm . . . doesn’t he need to, um. . . ?
Okay, something I admittedly noticed is that I lost touch with the lore along way. TAG 1 and 2 represent the most convoluted the story has become, involving all sorts of characters and ritualistic occurrences that fail to fully resonate. The events in the base game felt easier to follow, with a gradual journey to the more esoteric areas in the game, like Urdak. Here, I’m honestly wondering what the hell is really going on half of the time as I tune out that wimpy intern’s voice and push ahead. Therefore, if a narrative analysis seems absent here, that’s probably because I’ve gotten too lazy to piece together all the gaps in the Doom Slayer’s extended tale by reading pages and pages of codex. Maybe I’ll do it one day, but as the in-game universe grows further and further away from the rather simplistic essence of the original, I find myself becoming less interested, though I do respect id Software for diving headfirst into the nerve-racking task of expanding Doom’s world. With that out of the way, let’s continue.
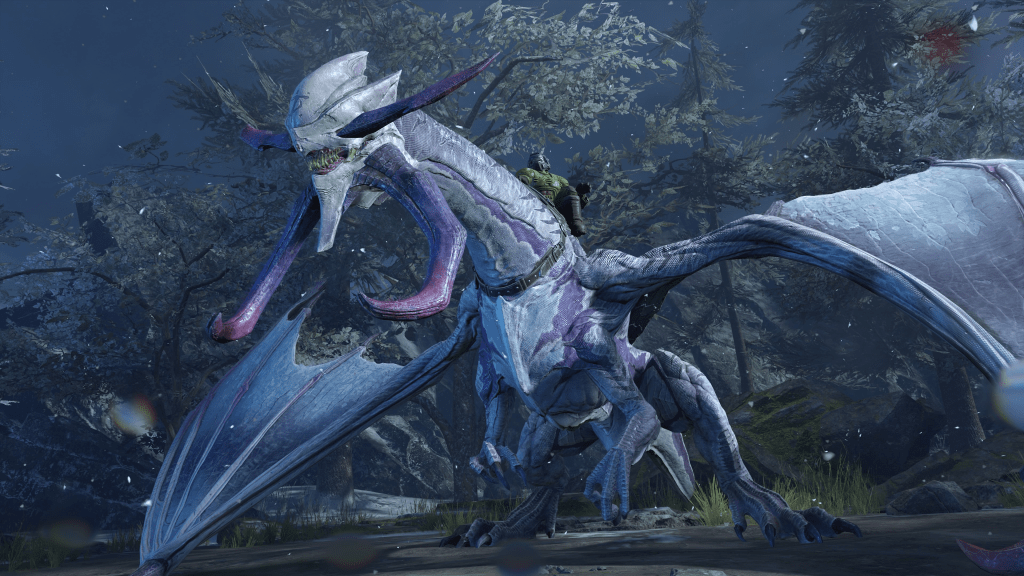
So, the Doom Slayer heads to The World Spear, a stronghold high on a verdant mountain range, a refreshingly bright and earthy setting to begin with. It’s not long before green grapple points are introduced. They hover in the air during platform sequences and occasionally during battles, allowing the Doom Slayer to shoot out his meat hook and swing around (let’s not think about that sentence too hard). This is a fantastic new addition which is slightly underutilized, in my opinion. Speaking of opinions, TAG 2 is widely considered to be easier than TAG 1, a conclusion many fans were disappointed to draw. I agree. Grapple points may contribute to the perception of less difficulty, as players rise above dangerous projectiles and crash-land with their Sentinel Hammer in hand, but I don’t mind the cathartic rush of a power trip after TAG 1’s arduous voyage. When the grapple points show up during combat, I always make sure to use them, even if I haven’t thought of a particular strategy yet. Soaring through the air just seems like the right thing to do.
The Sentinel Hammer is a melee weapon to replace the Crucible Blade, with a more particular functionality than auto-kills. In fact, it really doesn’t kill at all. Instead, it stuns demons, complete with a cartoon bird-flying-in-circles sound cue. Ammunition is also dropped on each successful strike, so revving the chainsaw is no longer the only way to gather ballistics. Activating the Sentinel Hammer sends the Doom Slayer into air where he prepares for a plummeting slam. You can imagine the rush of boundless brutality when riding the momentum of a grapple point, then equipping the hammer at the zenith of the Doom Slayer’s ascent to smash back down from way on high. The hammer’s recharge rate is rather slow, but there are also plenty of instant refills scattered throughout each level as soon as the hammer is introduced. I personally prefer the Sentinel Hammer to the Crucible Blade because of its strategic potential. Stubbornly spammy demons like Cyber Mancubus can be opened up for a few free shots. Even the Marauder’s stun window from a Super Shotgun blast is made extendable with the hammer. Frozen demons will provide extra healing when the head of the hammer creates its righteous shockwave, which saved my life on more than one occasion. The same effect applies to burning, with ammunition appearing either way. Although the goofy audio details pull Doom further away from resembling anything comparable to its horror-ish roots, shattering a group of frozen fodder and Hell Knights beneath the red glow of Sentinel tech is another reason why TAG 2 feels slightly more fun to play than its add-on predecessor, despite losing a degree of difficulty.
More new enemies appear, but to label them ‘new’ may feel like a bit of a stretch, as they’re mostly slightly altered versions of preexisting demons, giving the impression that id Software glued together scraps off the cutting room floor and threw them back into the mix. Stone Imps, Cursed Prowlers, and Armored Barons of Hell arrive to further complicate the Doom Slayer’s slaying. The good news is, none of these creatures operate in the same restrictive manner as Spirits (yes, they’re back too, this time possessing a Mancubus that killed me four times during my most recent run). Instead of only one technique applying to their demise, there are multiple ways to dispatch these demons, yet the most viable depends on the current situation. Stone Imps, for instance, can be pulverized into pebbles with the full-auto mod for the Combat Shotgun. When they’ve been successfully killed in this manner, they’ll drop a small supply of shotgun ammo, urging players to continue pumping shells into the rest of them. In a pinch, Stone Imps can be defeated traditionally, though they are more resistant to every other weapon than their fleshy cousins. When there are several Stone Imps on screen at once, they can ping pong the Doom Slayer around with the Sonic the Hedgehog attack they’re given, which can be rather annoying, though they won’t stick around for long in the face of rotating barrels.
Armored Barons of Hell are also protected by a hard exterior. Shooting at Armored Barons with any weapon will eventually shatter their armor. Keyword: ‘eventually.’ Then, the unscathed flesh of the Baron beneath is revealed, requiring loads more ammunition to defile. Therefore, it’s best to wait until the fully armored Baron flings its morning star at your face, telegraphed by a green flash á la Marauder strikes, as landing a Ballista shot on the morning star itself will immediately shatter the demon’s protection. Here’s the catch: as soon as the armor clatters to the ground in pieces, it’s a short time before it magically reappears. My only real gripe with these guys is the awkward pauses that result in anticipating their green flash, though it’s usually my own fault for missing the first couple of shots and having to wait around as a consequence.
Finally, Cursed Prowlers behave like mischievous elves, sticking the Doom Slayer with some sort of plasma goo that sticks an ugly green filter to the screen and prevents players from dashing. The only way to kill a Cursed Prowler in this state is slowly corner it as it scampers off, then land a Blood Punch. Overall, their presence is quite forgettable, especially because they can be easily killed before ever having the chance to goo you.
The traps and tricks that served as fun highlights of TAG 1 are back again, this time alongside more opportunities to go all-out as a powered-up Doom Slayer. Early on, the summoning of a half-dozen or more Pinky demons heralds the increased inclusion of mostly mindless slaughter, as floating just off the ground are numerous Blood Punch gauntlets . . . you can see where this is going. As the DLC continues, so does the unshackling of the Doom Slayer’s might. At one point, bountiful Sentinel Hammer charges litter the ground as demons spawn in, soon to be dizzied and promptly destroyed by a maniacal Mr. Game and Watch in green armor. Toward the very end of the Immora, the last mission, hordes of Stone Imps fill a large, flat area that has been covered in more than enough shotgun shells to annihilate them with. Your only job is to point and shoot while strafing back and forth to collect more shells. While these segments can almost resemble an on-rails playstyle, as copious power-ups all but guarantee your survival for the next minute or so, they can still be fun to indulge in. Breezing through TAG 2, aside from a few challenging battles that forced me to sit up and focus (the arrival of the Spirit Mancubus included), was, in some ways, more satisfying than trudging through TAG 1.
When it comes to the final bosses, Samur can get bent, but the Dark Lord can get bent, broken, burned, and buried twenty feet under in a steel casket. id Software went back to the green flashing well one too many times. The Doom Slayer shuffling around like he has to pee while his evil twin teases the right kind of attack to interrupt is not my idea of a good time. When the Dark Lord is stunned, using the Sentinel Hammer will extend his daze, which allows for extra damage dealing, until he begins summoning elite demons to distract you from the task at hand and sapping your health to absorb it himself, turning this into another frustrating fight that happens to take place on a flat circle of nothing, allowing players no opportunities to flex their agility. I expected the previously established grapple points to make an appearance, but no, it’s a totally grounded dance with the knockoff devil instead. During my recent playthroughs of the DLC’s in preparation of this post, I managed to suffer through Samur but admittedly cut my clash against the Dark Lord short, unwilling to put up with five rounds of nonsense for the sake of saying I did it twice. I wanted more from the final, final, final boss fight, as well as the buildup leading to it. The climactic battle of Sentinels versus demons in Immora is supposed to feel totally epic and awesome, but it only results in a backdrop to the Doom Slayer’s typical activity. Though Doom Eternal is, in my opinion, a truly polished game with visual appeal in spades, it’s not necessarily a cinematic experience, making for an unnatural finale that at least nails the scope of such a war, just not the immersion. It’s not as hollow as God of War Ragnarök’s ending, it’s just not very interesting either.
I think one thing has become clear to me when playing and subsequently writing about TAG 1 & 2: Doom Eternal is a masterpiece that has officially overextended its own potential. A day will never come when I tire of playing through the base campaign, which I’ll surely revisit here and there over the course of my life. However, due to added attempts at evolution in TAG 1 that fall flat, and the general lack of a lasting impression that TAG 2 leaves after a convoluted climb to the Dark Lord’s sanctum, I’ve concluded that id Software is ultimately making the correct call by scaling it back with Doom: The Dark Ages. Of course, we won’t know exactly what a new spin on modern Doom will entail until May 15th, but after the success of Doom 2016’s direct and drastically different sequel, I’m sure id Software can handle an equally significant shift in a new direction, one that doesn’t obsess over pouring more and more ingredients into the same formula but chooses to alter the composition of its moment-to-moment gameplay challenges and rewards. It’s time for another new age to commence.

Leave a comment